


Overview
In this advanced article of the series R Shiny, We will explore the integration and application of Bootstrap, bslib, and thematic in R Shiny applications. Whether you're new to Shiny or looking to enhance your existing apps, this article will equip you with the knowledge and tools to create your own customized Shiny application.
We will start with an introduction, explaining concepts like Bootstrap and Bootswatch. Then, we will start diving into the bslib and thematic packages, exploring their theming options and how they can be used to customize UI elements in Shiny. We will guide you to the basic and advanced theming capabilities of these packages.
By the end of this article, you will have the ability to enhance the visual design of your Shiny apps using the theming options provided by bslib and thematic. Throughout the article, we will give code snippets as hands-on examples. These practical demonstrations will show you how to apply bslib and thematic themes to various UI elements, bringing your Shiny apps to life.
Introducing Concepts
Bootstrap is the most popular HTML, CSS, and JavaScript framework for developing responsive websites. It offers pre-designed elements and a responsive grid system, simplifying the creation of professional websites. In R Shiny it enhances the user interface design with responsive layouts and interactive elements.
With Bootstrap integrated into R Shiny, you can create web applications with only R code, without needing extensive knowledge of traditional web technologies like HTML or CSS. Shiny leverages Bootstrap for its user interface components, This integration is the basis for the appearance and interactivity of Shiny applications.
Customization of your Shiny app is important, and this is where Bootswatch steps in. It offers themed Bootstrap stylesheets for quick customization. These themes are showcased in resources like the Shiny Theme Gallery. The bslib package further extends customization capabilities in Shiny, supporting the more modern Bootstrap 4 instead of shinythemes Bootstrap 3 integration. bslib smoothly integrates with Shiny, enabling a broader range of design options, and making it easier to tailor the appearance of your Shiny app.
Complementing this bslib package with the thematic package in R aligns your plotting style with the active Bootstrap theme from bslib. Thematic ensures consistency across all visual elements of a Shiny application, including data visualizations, maintaining a uniform look and feel.
Together, Bootstrap, Bootswatch, bslib, and thematic offer a comprehensive toolkit for R Shiny developers, streamlining the process of creating a visually cohesive, coherent and attractive shiny app.
The bslib package
Writing CSS code within your R shiny app using inline CSS or a CSS file, can get complicated and is error-prone. And as an R user, it requires learning a new language. Instead of doing that, you can use bslib, which simplifies the customization of Bootstrap CSS within Shiny apps and R Markdown documents using R functions. bslib allows to override many Bootstrap defaults to create a unique app appearance.
Here is the code to instal the bslib package:

# Ensure that the version of Shiny is 1.7 or higher
if (packageVersion("shiny") < "1.7") {
  install.packages("shiny")
}

# Check and install the 'bslib' package if not already installed
if (!requireNamespace("bslib", quietly = TRUE)) {
  install.packages("bslib")
}

# Load the necessary libraries
library(shiny)
library(bslib)
Real-Time Theming
Hands-on practice is the easiest to understand the power of the z package. Luckily, it is incorporated with real-time theming to let you hands-on experiment with different (Bootswatch) themes, main colors, fonts and more.
Just call bs_themer() within the server function, and you can get started:
# Define UI
ui <- fluidPage(
  theme = bs_theme(),  # Initialize bslib theme
  titlePanel("Welcome to the TilburgScienceHub"),
  sidebarLayout(
    sidebarPanel("Sidebar content here..."),
    mainPanel("Main panel content here...")
  )
)

# Define server logic
server <- function(input, output, session) {
  bs_themer()  # Add real-time theming feature
}

# Run the app
shinyApp(ui, server)
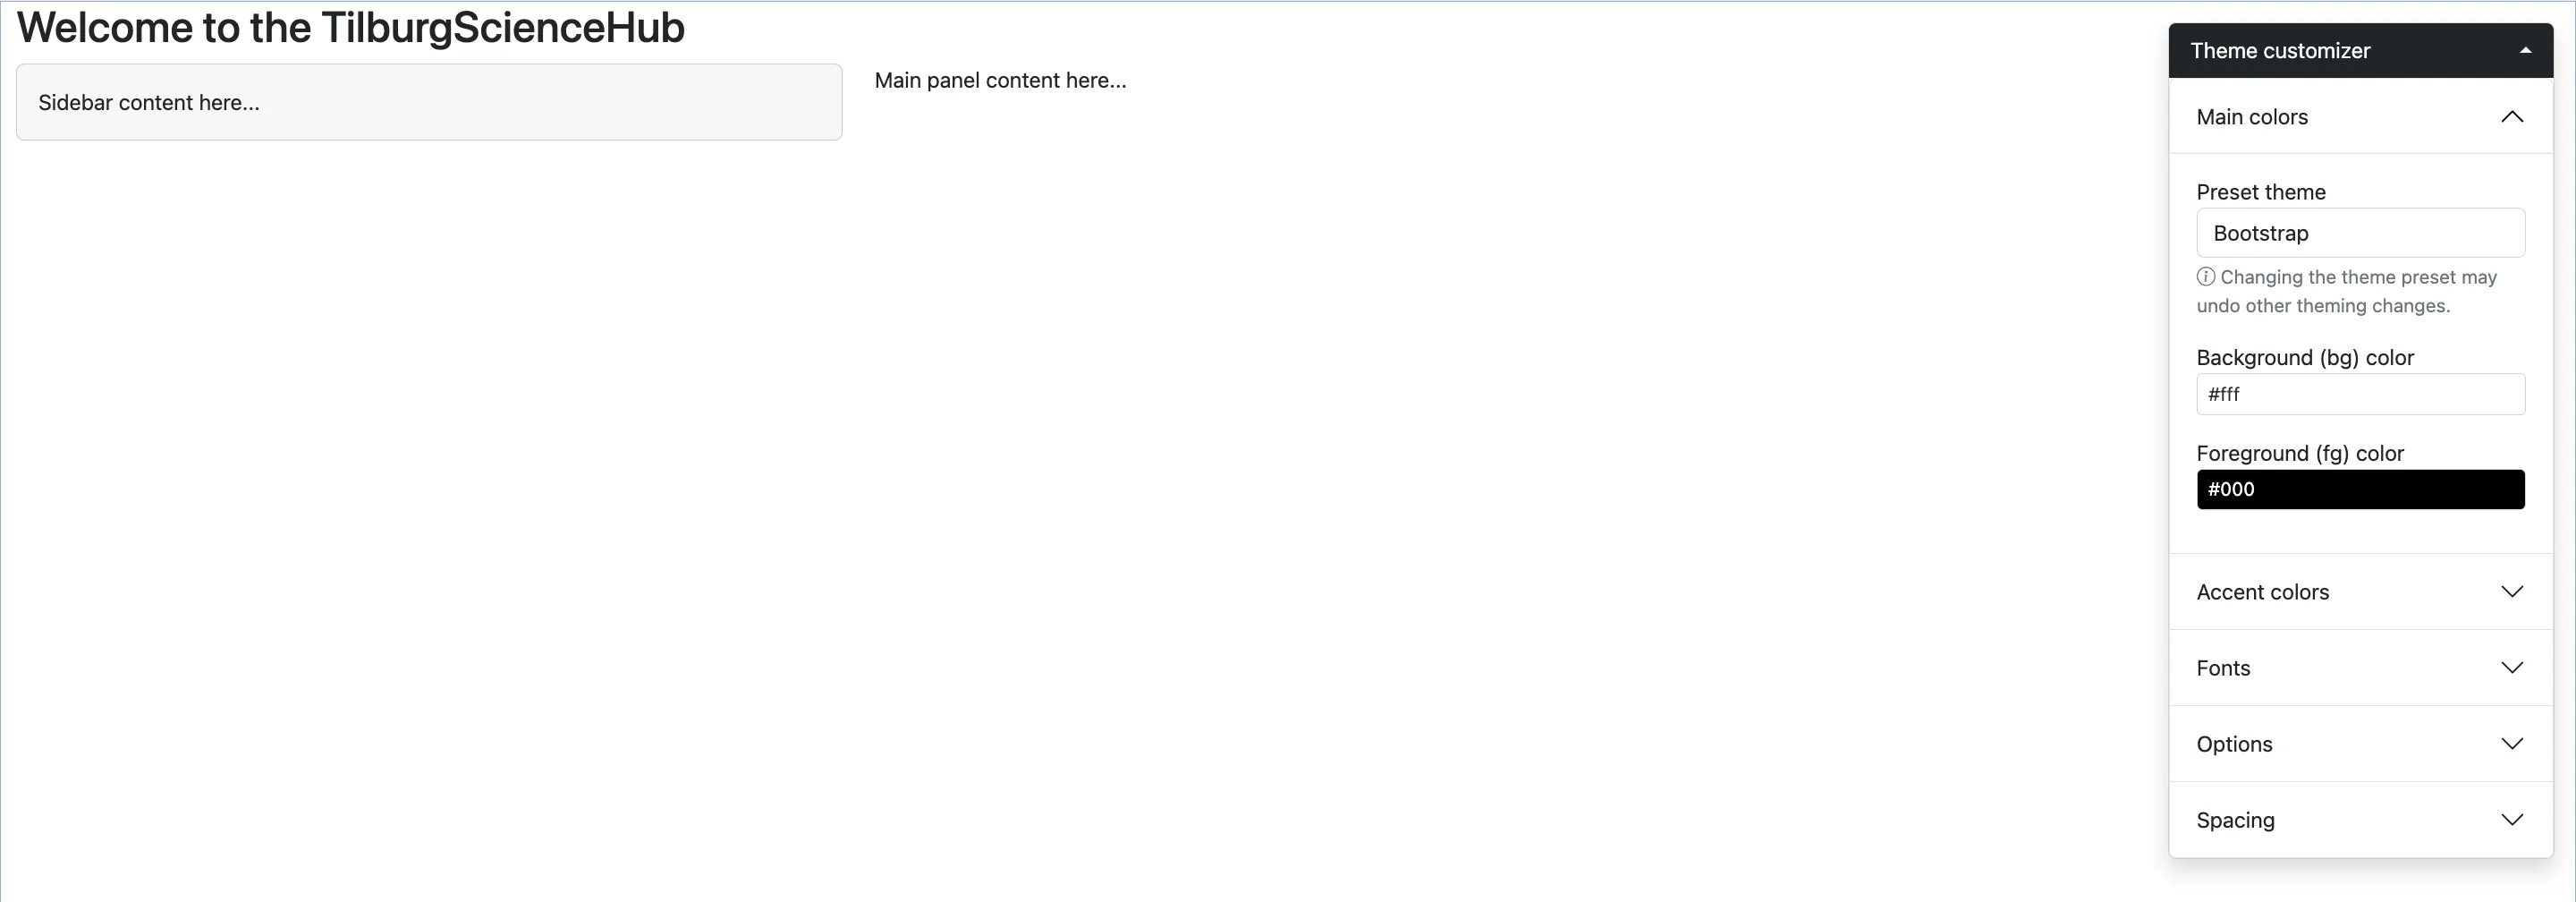
 Tip
TipThe bslib package also includes the bs_theme_preview() function. Just run the bs_theme_preview() function solely and automatically a demo Shiny app will open. Here you can check out all the theming and customization.
Pre build themes
If you have gotten yourself familiarized with all the themes possible, or you have found the theme you would like to incorporate into your app. Then pick the premade "Bootswatch" theme and specify the bootswatch argument into the bs_theme() function.
ui <- fluidPage(
  theme = bs_theme(bootswatch = "Your Theme"),
  sidebarLayout(
    sidebarPanel(
      textInput("txt", "Text input:", "text here"),
      sliderInput("slider", "Slider input:", 1, 100, 30)
    ),
    mainPanel(
    )
  )
)
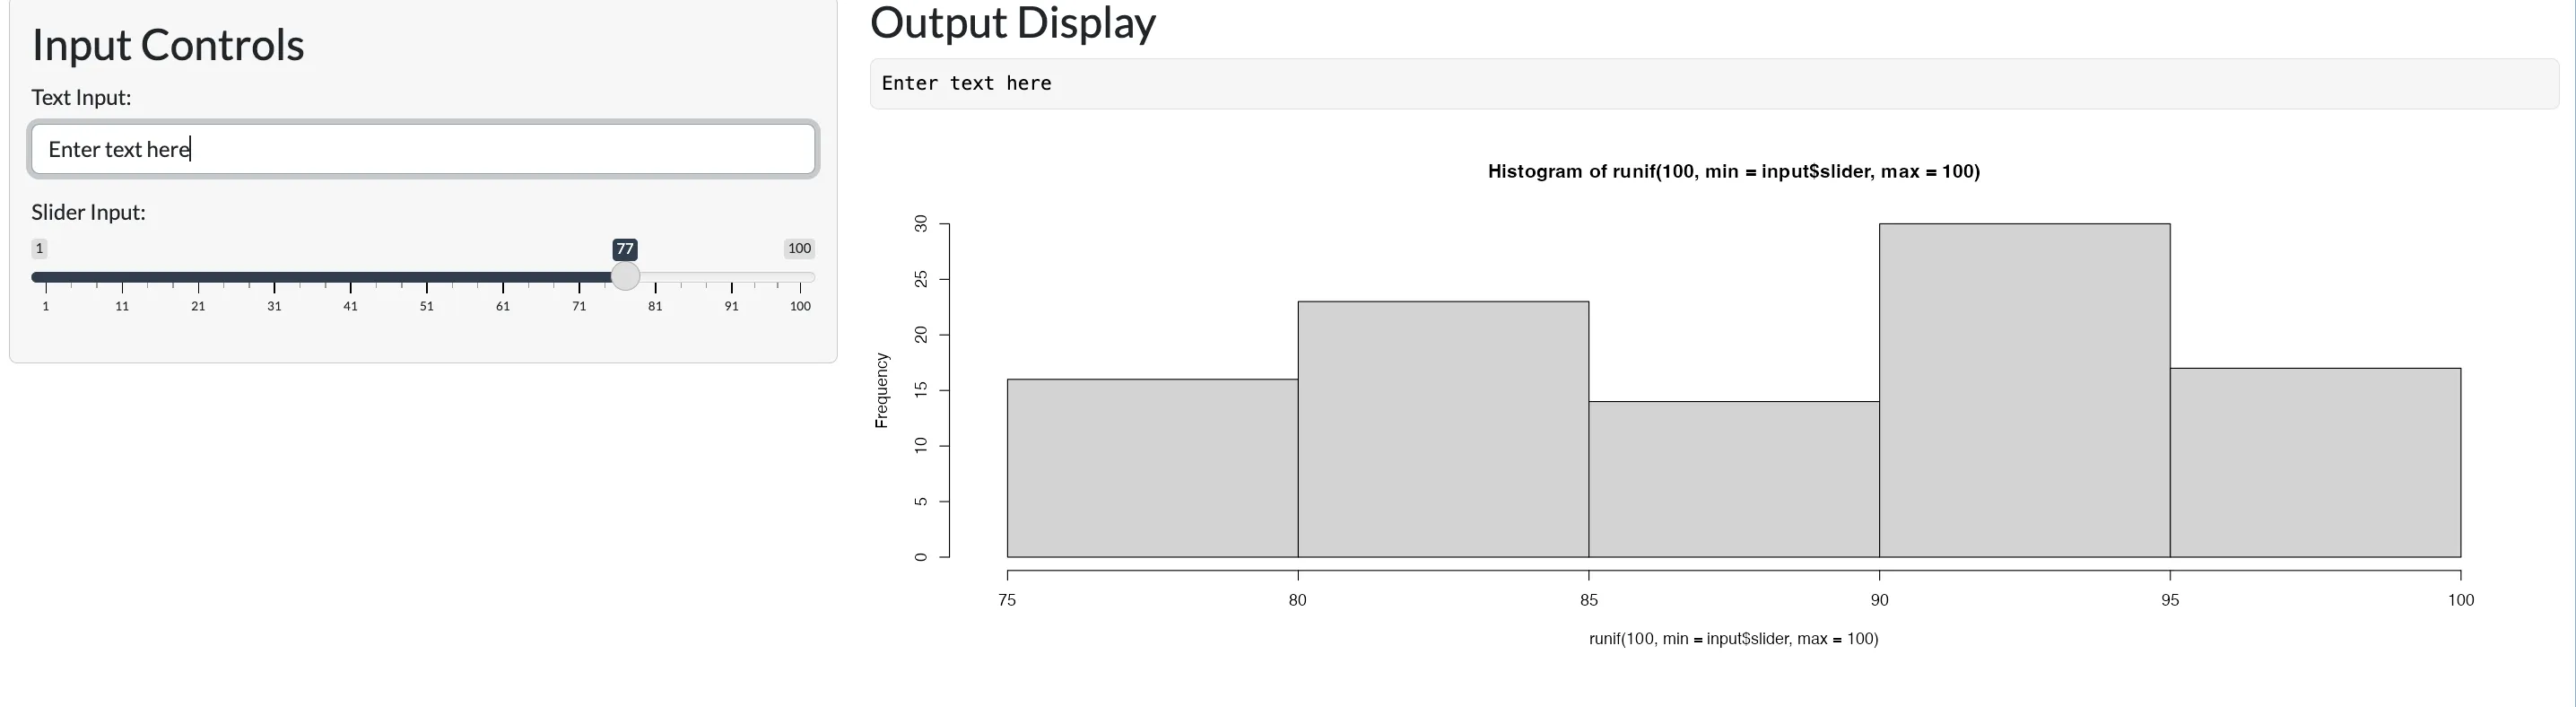
TipAll the Bootswatch themes are available through the bs_theme()’s bootswatch argument. Note, we have seen bootswatch themes earlier in the R shiny series, specifically in this article. Where we used the Shinythemes package. This approach allows you to make use of Bootswatch 3 themes, but with the bslib package, you can use in addition use Bootswatch 4 themes, like minty or zephyr.
Customization
The bs_theme() function in Shiny provides customization options for your app's appearance. Allowing you to specify many elements:
- Main background (bg) and foreground (fg) colors
- Which affects nearly every single color on your screen
- Accent colors: primary, secondary, etc.,
- For elements like hyperlinks and navigation links and elements like action buttons or notifications.
- Fonts: Three main fonts can be set: base_font, heading_font, and code_font.
- You can provide a character string of (comma-separated) font families to these arguments
- e.g., bs_theme(base_font = '"Times New Roman", Times, serif')
TipIf you're interested in Google Fonts, which offers a wide variety of free, open-source fonts, you can explore their collection at Google Fonts. Here you find a range of font styles, that can be easily incorporated into your web app.
For pairing suggestions and combinations of these Google Fonts fonts, use fontpair.co, which is a great resource. It showcases effective font pairings, especially helpful for creating visually appealing and readable web content.
# Example 1 Within UI
page_sidebar(
  title = "Your App",
  bs_theme(
    bg = "#YOUR_BACKGROUND_COLOR_CODE",  # Replace with background color code
    fg = "#YOUR_FOREGROUND_COLOR_CODE",  # Replace with foreground color code
    primary = "#YOUR_PRIMARY_COLOR_CODE",  # Replace with primary color code
    secondary = "#YOUR_SECONDARY_COLOR_CODE", # Replace with secondary color code
    success = "#YOUR_SUCCESS_COLOR_CODE",  # Replace with success color code
    base_font = font_google("YOUR_BASE_FONT_NAME"),  # Replace with base font
    code_font = font_google("YOUR_CODE_FONT_NAME")  # Replace with  code font
  ),
)

# Example 2 Before UI
bs_theme_new()
bs_theme_base_colors(bg = "#YOUR_BACKGROUND_COLOR_CODE", fg = "#YOUR_FOREGROUND_COLOR_CODE")
bs_theme_accent_colors(primary = "#YOUR_PRIMARY_COLOR_CODE")
bs_theme_fonts("YOUR_BASE_FONT_NAME")
Dynamic theming
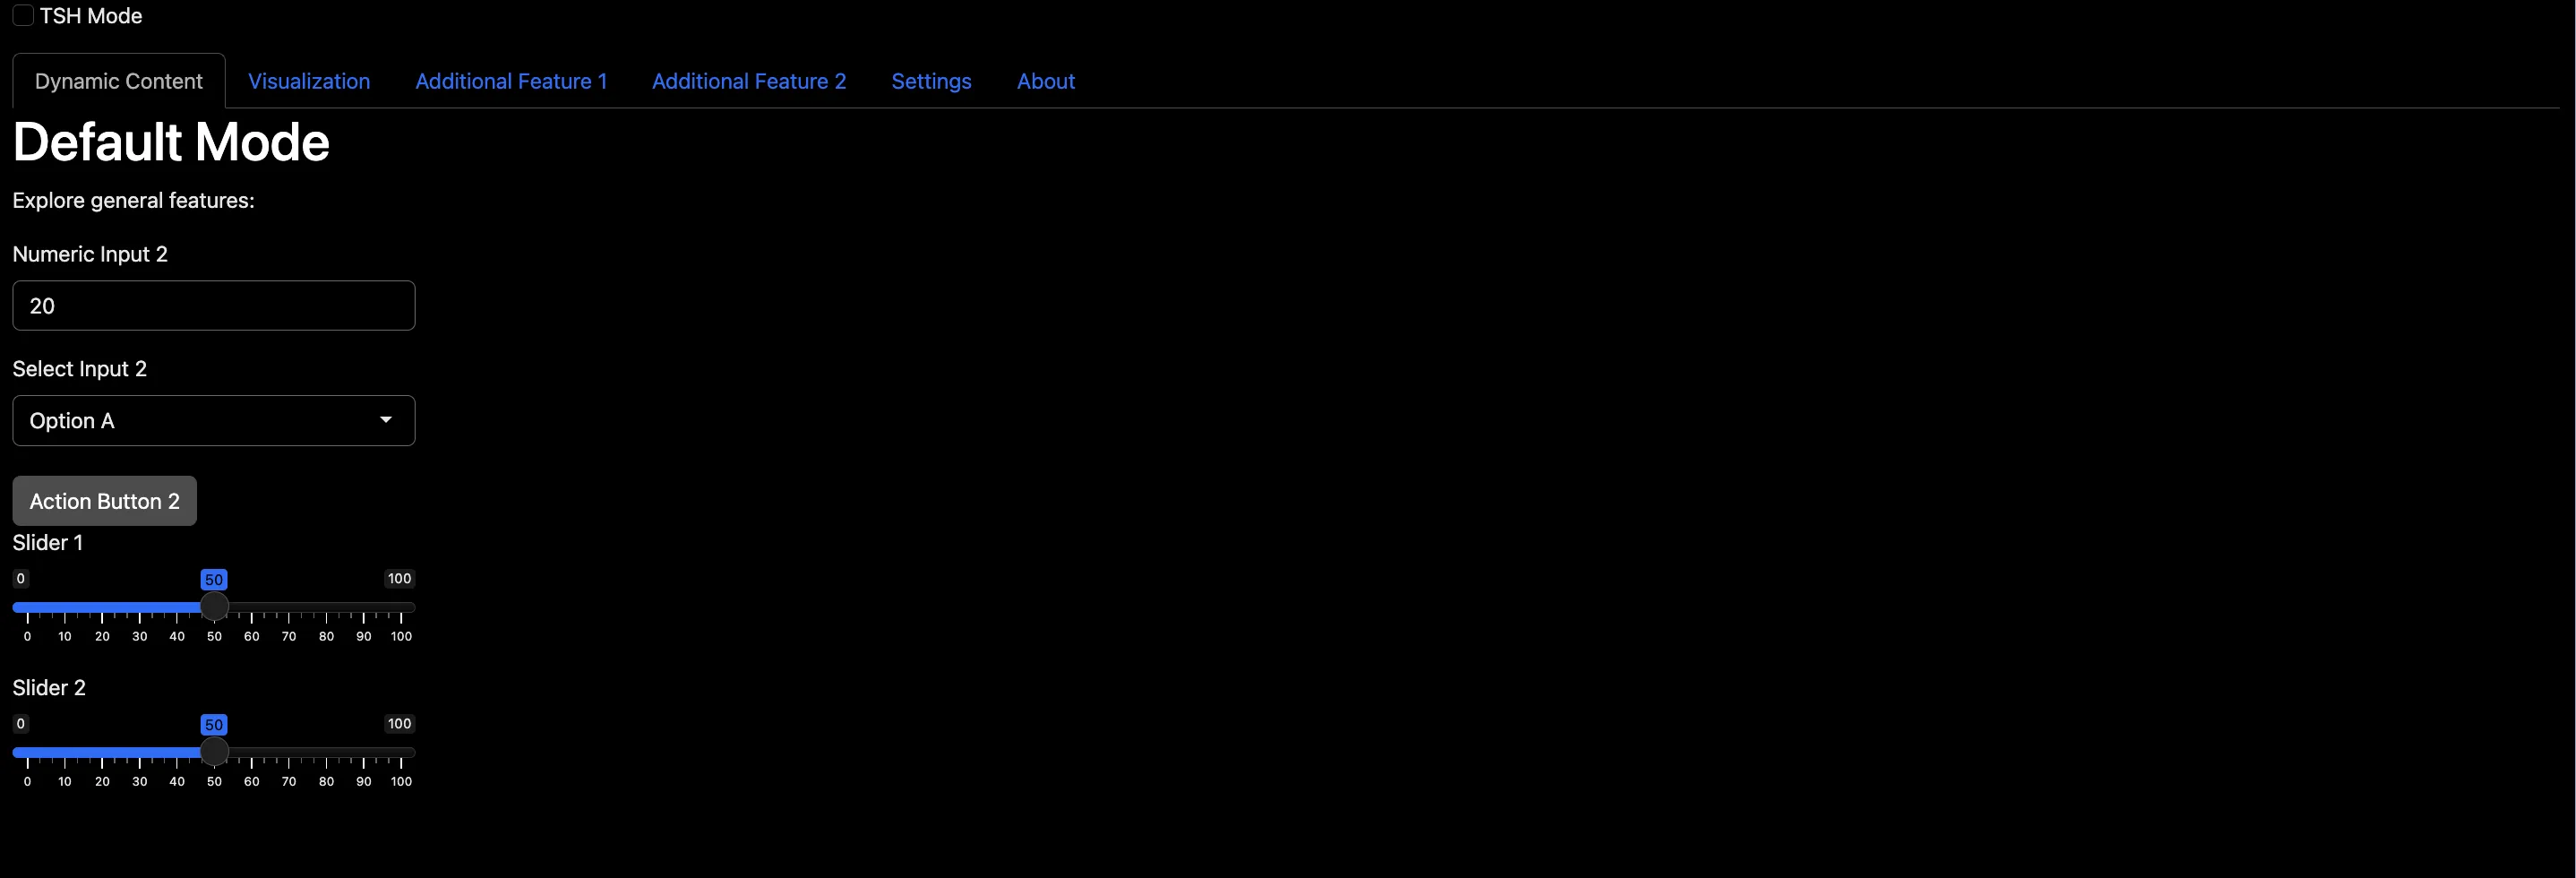
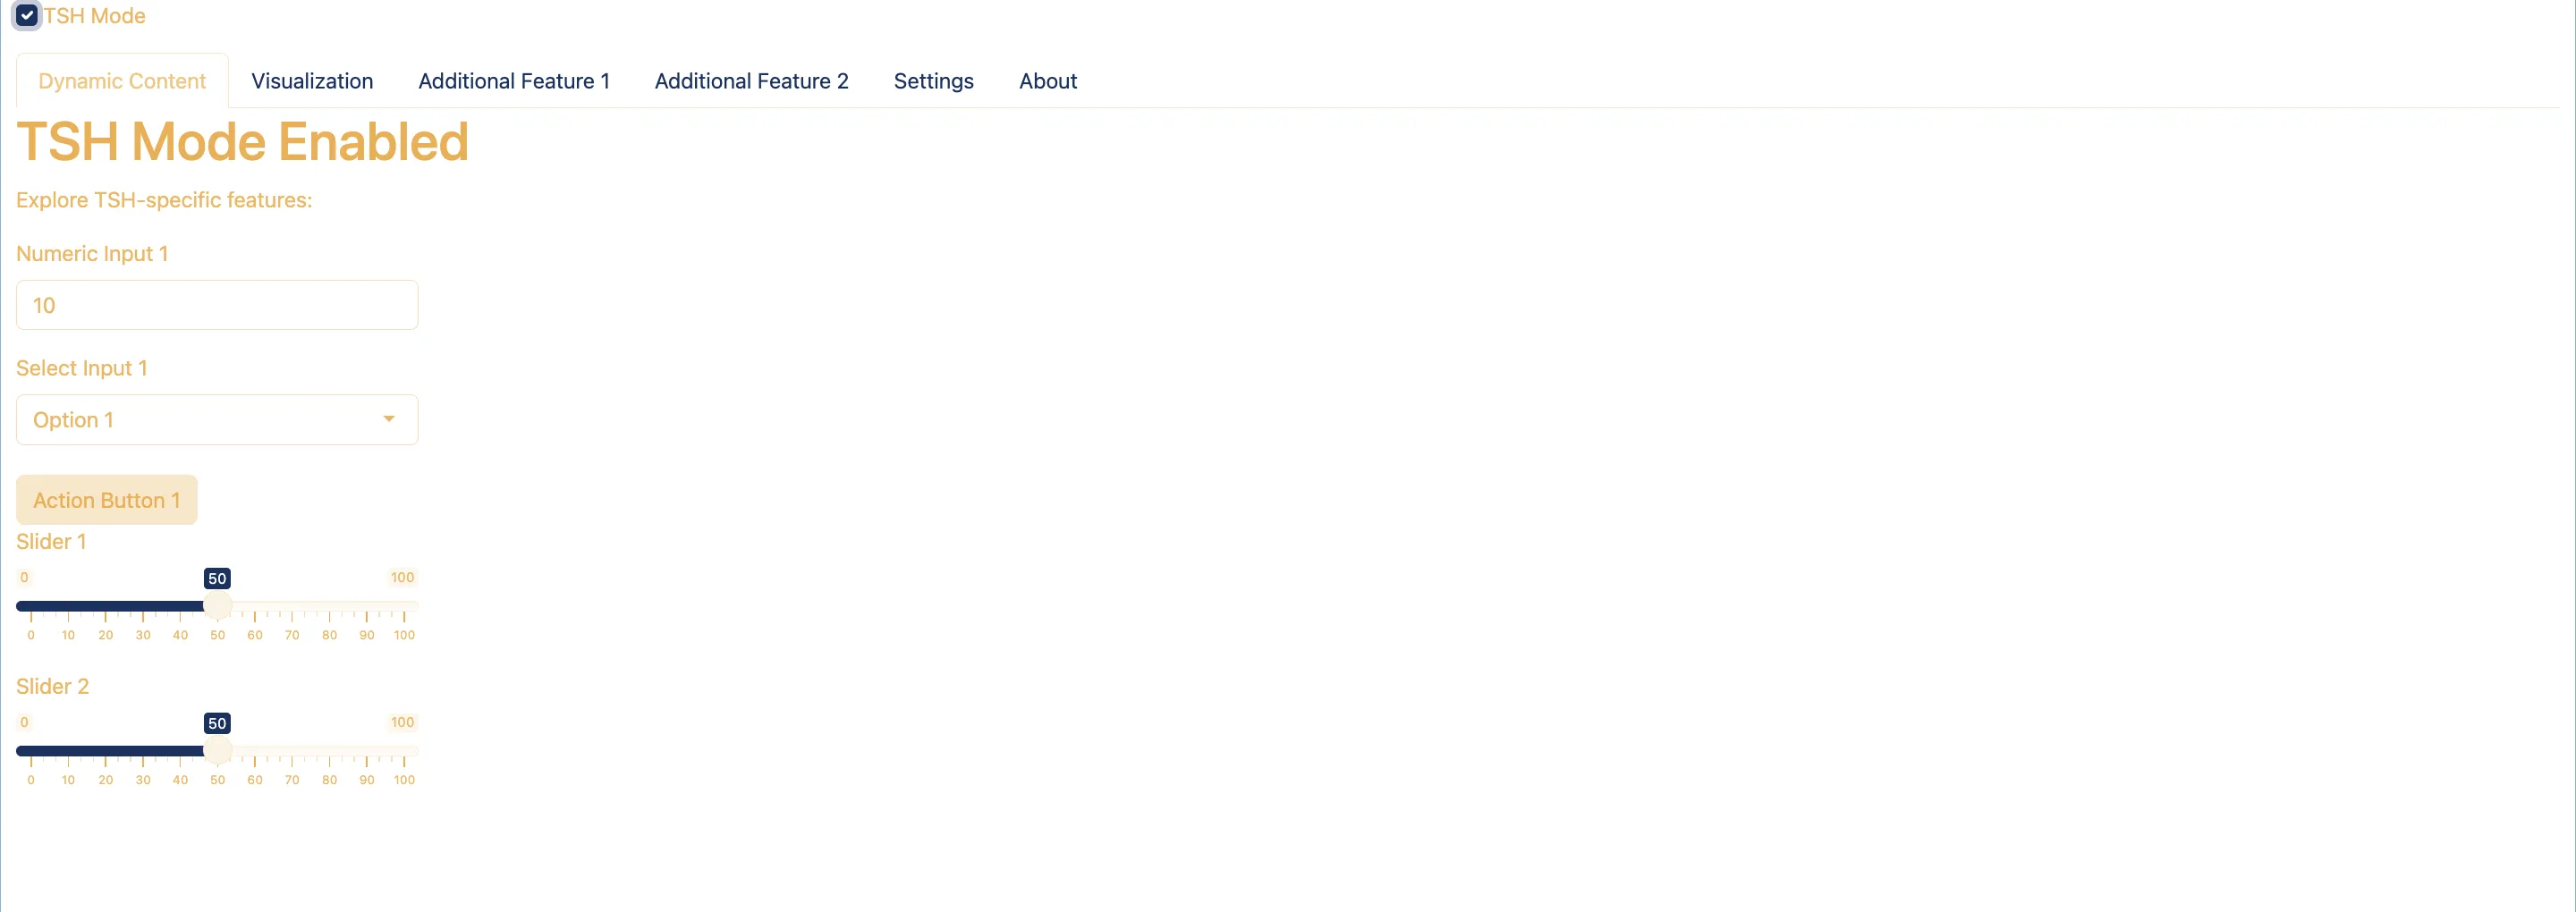
The real-time theming functionality in Shiny apps allows you to create custom theming widgets. Think of real-time theming as adding a light switch to your app, enabling theme changes at the flick of a switch. Using setCurrentTheme(), you effectively repaint your app with a fresh theme. This dynamic approach means your app can quickly adapt its appearance based on user interactions or preferences.
So let's bring this analogy to life using this example:
dark <- bs_theme(bg = "black", fg = "white") # Custom theme 1
TSH <- bs_theme(bg = "white", fg = "#f3ad42", primary = "#123261") # Custom theme 2 (The TSH colors)

ui <- fluidPage(
  theme = dark, # Set the dark theme as base theme
  checkboxInput("tsh_mode", "TSH mode") # Create a button TSH mode
  # Other sliders code
)

server <- function(input, output, session) {
  observe(session$setCurrentTheme( # The observe function, allows for the code to only run if the input button is altered,
    if (isTRUE(input$tsh_mode)) TSH else dark # If the switch is turned on, change the theme
  ))
  # Your Server Code
}

shinyApp(ui, server)
TipThe bs_theme() function in Shiny offers a range of customization options for your application, allowing you to modify colors, and fonts as explained before. However, it also includes new variables and widgets. This function takes advantage of Bootstrap Sass variables for detailed theming, providing access to hundreds of specific options.
The thematic package
Now that we learned to create unique themes with bslib for your Shiny app, you might want to align the plots in your app with your custom theme. This synchronization is achieved using the thematic package. thematic automatically translates CSS styles into R defaults, ensuring consistency across your app's design. It simplifies theming for ggplot2, lattice, and base R graphics not just in Shiny but also in R Markdown and RStudio. To match your plots with your app's style in Shiny, just use thematic_shiny() in your server function. Now it will adapt plot styles to match your app's theme, ensuring a cohesive and professional look.
Installation
install.packages("thematic")
install.packages("shiny") # Auto theming in Shiny requires shiny 1.5.0 +

# Using themes with custom fonts works best if you have showtext and/or ragg installed.
install.packages("showtext")
install.packages("ragg")
R shiny
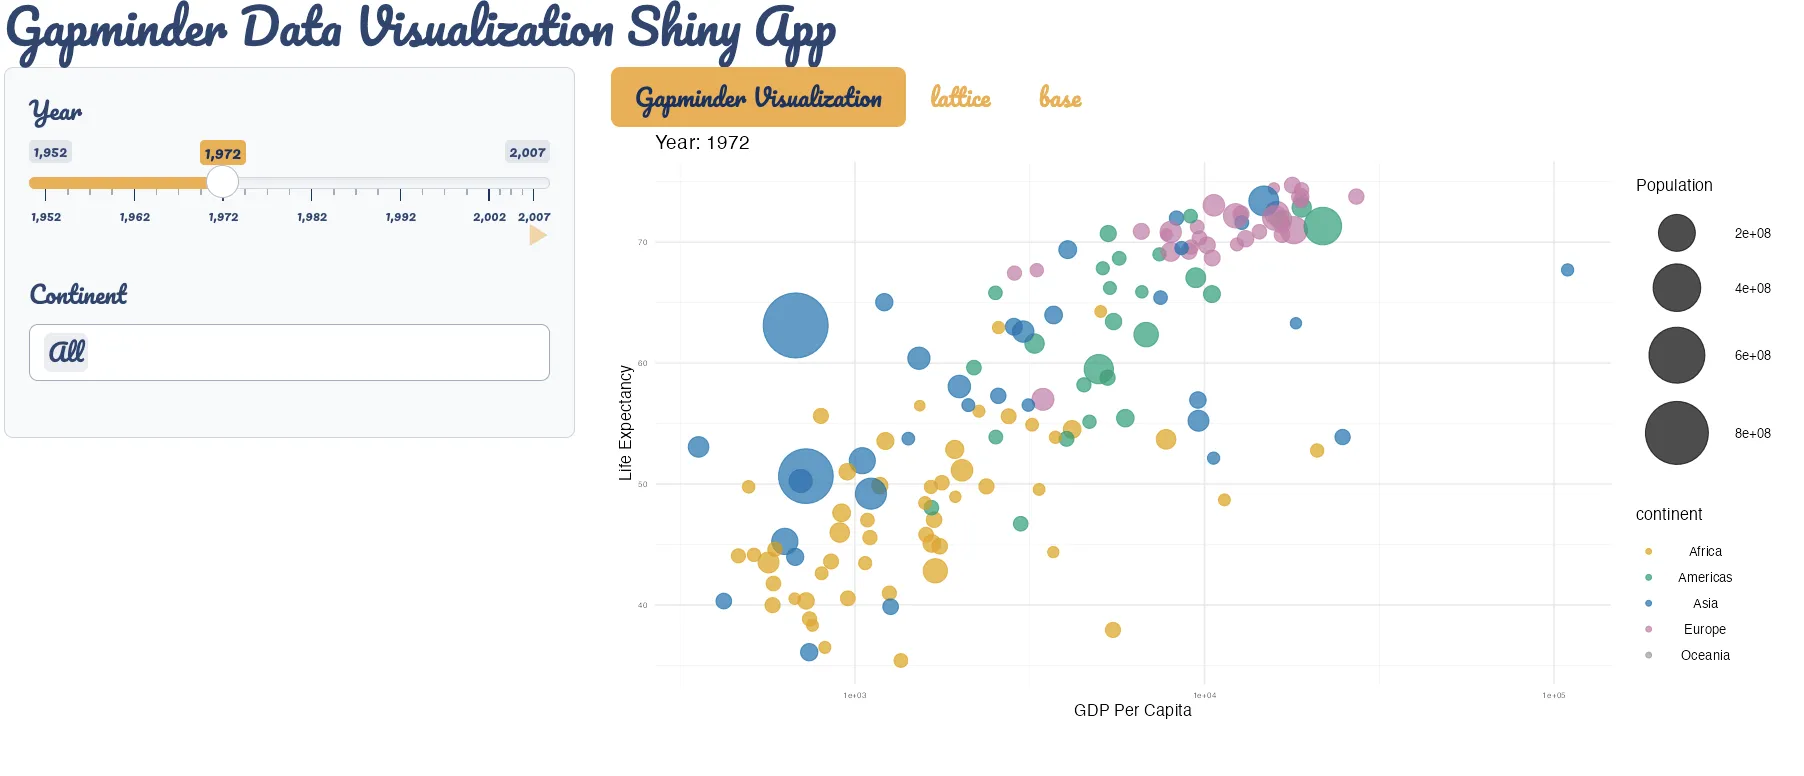
Let's dive into a practical example, of how to use the thematic package in your shiny app. As we have discussed the bslib let's combine them!

# Download example code in the top right corner
TipR Studio and R Markdown
In RStudio, to make your plots reflect the current theme, you can call thematic_on() before you start plotting. This makes all the plots you create afterwards match the RStudio theme. If you need to stop this effect at any point, just use thematic_off(). For a one-off use of thematic just use thematic_theme().
In R Markdown, call thematic_rmd() before generating plots inside R Markdown to have all following plots within the document reflect the relevant theme.
- In a static, non-shiny, R Markdown context, auto-theming only works with bslib-powered theming
- You can specify colors and fonts explicitly to thematic_rmd().
Summary
 Summary
In this advanced article in the R shiny series, we delved into the integration and application of Bootstrap using bslib, and thematic.
This article discusses:
- An overview of Bootstrap and Bootswatch for responsive web designs in Shiny,
- The bslib package for easy customization of Bootstrap CSS using R functions, facilitating unique app appearances.
- Introduction of real-time theming with bslib, offering hands-on experimentation with themes, colors, and fonts.
- The thematic package that complements bslib, aligning plot styles with the active Bootstrap theme, ensuring visual consistency in Shiny apps.
- Practical code examples and tips for applying these tools to enhance the visual design of Shiny applications.